
Imagine your favorite window transformed into a kaleidoscope of color—each pane refracting light and painting your room in ever-shifting hues. Hanging stained glass in a window isn’t just a decorative upgrade; it’s a way to bring artistry, privacy, and personality into your home. In this guide, you’ll discover every step of how to hang stained glass in a window, from planning and installation methods to design tips, safety considerations, and maintenance. Let’s get started on creating your very own stained glass masterpiece.
Table of Contents
How to Hang Stained Glass in a Window ?
Before you dive into hardware and techniques, consider the benefits you’ll enjoy:
- Brilliant Light Play
Stained glass casts colorful reflections that animate your space throughout the day. - Increased Privacy
Translucent glass obscures outside views while still allowing light to pass. - Artistic Expression
Custom patterns or vintage panels let you showcase your taste and story. - Functional Versatility
Use stained glass as a window partition, suncatcher, or room divider. - Enhanced Energy Efficiency
Laminated or double-pane stained glass units can improve insulation.
Whether you’re drawn to geometric Tiffany-style panels or bold Art Deco designs, stained glass brings timeless charm and practical perks to any window.
Planning Your Stained Glass Installation
Measuring and Preparing the Space
- Measure Twice, Cut Once
- Record height and width at three points (top, middle, bottom; left, center, right).
- Subtract 1/8″ to 1/4″ total on each dimension for clearance.
- Record height and width at three points (top, middle, bottom; left, center, right).
- Check Window Frame Material
- Wood frames require different anchors than vinyl or aluminum.
- For double-pane windows, verify compatibility with piggy-back mounting.
- Wood frames require different anchors than vinyl or aluminum.
- Assess Weight Capacity
- A typical stained glass panel weighs 10–15 lbs per square foot.
- Confirm your hardware and frame can support the total load plus safety margin.
- A typical stained glass panel weighs 10–15 lbs per square foot.
Selecting the Right Hardware
- Hooks & S-Hooks: Best for leaded-came or copper-foil panels with looped solder points.
- Chains & Cords: Adjustable lengths allow perfect centering and height.
- Suction Cups: Temporary, renter-friendly solution for lightweight suncatchers.
- Piggy-Back Clips: Rubber-lined clips clamp onto existing window panes without drilling.
- Caulk & Cement: Create a permanent seal for exterior installations or double-glazed units.
By choosing hardware suited to your stained glass style, window frame, and desired permanence, you’ll ensure a secure, professional look.
Installation Methods
- Frame Reinforcement: If hanging heavy panels, install a support bar or cross-frame.
- Thermal Shock Prevention: Use laminated or tempered backing glass in sun-exposed windows.
- Wind Load Considerations: In high-wind areas, choose wired or laminated glass.
Piggy-Back Mounting on Existing Glass
This non-invasive technique sandwiches your stained glass between the window and a clear glass pane:
- Clean Both Surfaces: Remove dust and grease for adhesion.
- Apply Rubber Bumpers: Place small pads at key corners to prevent scratching.
- Slide Panels Together: Fit the stained glass inside the existing sash.
- Secure with Clips: Use piggy-back window clips to hold both panes firmly.
Pros: No drilling, easily reversible, ideal for renters.
Cons: Limited to double-pane windows, less wind-resistant.
Using Hooks and Chains
A classic approach for framed or unframed panels:
- Mark Your Points: Use a level and pencil to align two ceiling-mounted or header hooks.
- Install Anchors: For drywall, use toggle or molly anchors; for wood, pilot-drill and screw directly.
- Attach Chains: Hook one end to the panel’s soldered loops; adjust chain length for height.
- Hang and Level: Ensure the panel hangs flat against the window without tilt.
Pro Tip: Use stainless steel S-hooks to prevent rust and maintain longevity.
Suction Cup Techniques
Perfect for small suncatchers and budget projects:
- Choose Quality Suction Cups rated for at least 5 lbs each.
- Wipe Glass with Alcohol before pressing cups firmly against the surface.
- Hang Lightweight Panels (under 2 lbs) using attached rings or tabs.
- Check Suction Daily for the first week, then weekly thereafter.
Note: Suction cups work best on smooth, non-textured glass and in moderate temperatures.
Caulk and Cement for a Secure Fit
For permanent or weather-exposed installations:
- Apply Clear Silicone Bead around the panel edges.
- Position Panel and press gently to embed in caulk.
- Tool the Joint with a caulking tool or finger for clean lines.
- Let Cure 24–48 hours before exposing to moisture.
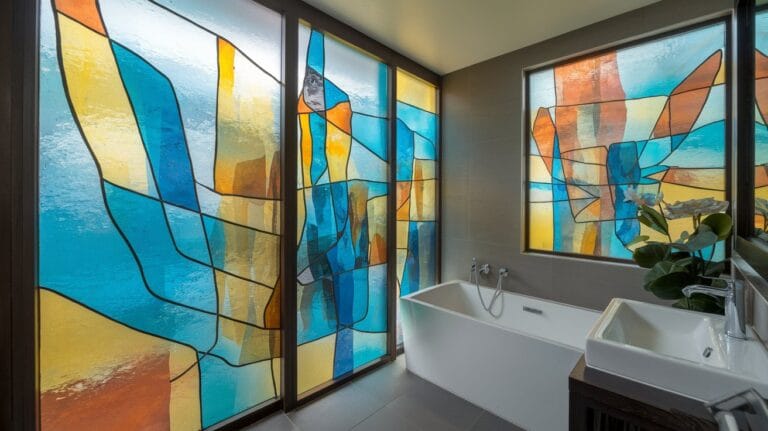
Use Case: Exterior windows, bathrooms, or areas prone to drafts.
DIY vs. Professional Installation
When to Go DIY
- You have solid DIY skills, tools, and confidence in measuring accurately.
- You’re hanging small, framed panels or lightweight suncatchers.
- You rent and need a reversible solution.
- Your installation is interior and low-wind exposure.
When to Hire a Pro
- You plan on floor-to-ceiling stained glass walls or large, heavy panels.
- You want integrated backlighting or LED systems.
- You need custom-fabricated leaded-came designs.
- Your project requires building-code compliance (e.g., fire-rated panels, church installations).
A professional installer ensures structural safety, precise alignment, and warranty compliance—especially vital for complex or high-value works.
Design and Customization Tips
Matching Your Decor
- Historic Homes: Choose Victorian or Craftsman-style leaded came patterns.
- Modern Interiors: Opt for geometric, abstract, or fused glass with minimal framing.
- Eclectic Spaces: Mix colored opalescent glass with clear textured panels for contrast.
Integrating Lighting
- Natural Light: Orient panels where they’ll catch morning or afternoon sun for maximum effect.
- Backlit Panels: Install LED strip channels behind glass for evening glow.
- Accent Lighting: Position spotlights or uplights to highlight intricate details.
Personalization Ideas
- Family Crests or Monograms: Commission custom motifs in the center of your panel.
- Nature Motifs for Biophilic Design: Botanical leaves, floral patterns, or animal silhouettes.
- Seasonal Islands: Swap in panels depicting spring blooms, autumn leaves, or winter holly.
By blending color, pattern, and light, you’ll create a truly bespoke feature that complements your home’s personality.
Safety, Durability, and Maintenance
Ensuring Longevity
Cleaning Your Stained Glass
- Dust Gently with a soft brush or microfiber cloth.
- Use pH-Neutral Cleaner: Mix mild dish soap with water; avoid ammonia or vinegar on putty lines.
- Wipe in Overlapping Strokes to prevent streaks; dry immediately with a lint-free cloth.
Repair and Restoration
- Re-leading: Replace deteriorated came with new lead channels and cement.
- Solder Joint Touch-Up: Reflow solder and apply patina for seamless repairs.
- Painted Glass: Use compatible enamel paint to retouch flaked areas.
Regular inspections—every six months—ensure small issues don’t become costly repairs.
Special Considerations for Renters
- Non-Permanent Solutions: Rely on high-quality suction cups or tension rods with adjustable bumpers.
- Command Strips: For tiny panels (under 2 lbs), heavy-duty picture strips work well.
- Portable Frames: Build a freestanding stained glass screen you can lean in the window.
These renter-friendly methods let you enjoy stained glass’s beauty without risking your security deposit.
Frequently Asked Questions
Q1: Can I hang stained glass in a double-pane window without drilling?
Yes—use piggy-back mounting with rubber-lined clips. It captures your panel between existing panes without permanent alteration.
Q2: What suction cups are best for hanging stained glass?
Choose high-temperature-rated cups with rubber seals locking mechanisms, each rated for at least 5 lbs.
Q3: How do I prevent stained glass from swinging in a drafty indow?
Install small rubber bumpers or clear silicone stops at the panel’s bottom corners to minimize movement.
Q4: Is it safe to use adhesive hooks for heavy panels?
Adhesive hooks are best for panels under 2 lbs. For heavier glass, use drilled anchors or piggy-back clips.
Q5: How much smaller should the panel be compared to the window opening?
Leave a 1/8″ to 1/4″ gap on each side to accommodate thermal expansion and ease of installation.
Conclusion & Call to Action
You now have a comprehensive roadmap for how to hang stained glass in a window—from choosing the right hardware and mastering installation methods to customizing designs and maintaining your panels. Whether you tackle a DIY project or enlist a pro, your window is about to become a vibrant work of art that transforms every ray of light.👉 Ready to brighten your home with stained glass magic? Explore artisan panels and installation kits, share your project photos with us using #MyStainedGlassWindow, and join our community of glass-art enthusiasts!