
How to Patch Holes in Plaster Walls ?
Holes in plaster walls are a common issue, whether caused by accidents, hanging pictures, or wear over time. Fortunately, patching holes in plaster is a manageable task with the right tools and techniques. In this article, we’ll walk you through the step-by-step process to efficiently and effectively patch holes in plaster walls, ensuring a smooth, seamless finish.
Table of Contents
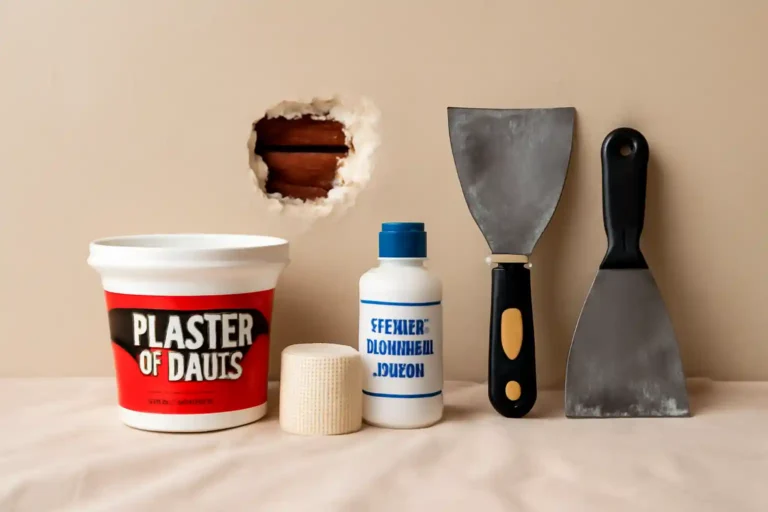
What You’ll Need:
Before starting, gather the necessary tools and materials to ensure a successful repair:
- Plaster bonding agent – Helps the repair material stick to the plaster.
- Plaster of Paris or joint compound – Used to fill holes.
- Fiberglass mesh tape – Reinforces the patch to prevent cracking.
- Putty knives – Usually a 4-inch and 6-inch knife for spreading compound.
- Utility knife – To clean and smooth the edges of the hole.
- Sanding block or sandpaper – To smooth the patched area once it’s dry.
- Paint and primer – To finish the job once the patch is complete.
- Dust mask and safety glasses – For protection during sanding.
Patch Holes in Plaster Walls Step-by-Step
Step 1: Clean the Hole and Surrounding Area
Proper preparation is key to a successful patch. Follow these steps:
- Remove any loose plaster: Use a utility knife to clean the edges of the hole, removing any loose or crumbling plaster. This helps the new patch material adhere better.
- Clean the area: Wipe the surrounding area with a damp cloth to remove dust and debris, ensuring a clean surface for the patch.
Step 2: Apply Plaster Bonding Agent
Plaster bonding agents help ensure that the patch material sticks securely to the existing plaster. Here’s how to apply it:
- Brush on bonding agent: Use a paintbrush to apply a thin, even coat of plaster bonding agent around the hole. This step is especially important if you’re working on bare lath or older plaster.
- Allow to dry: Follow the manufacturer’s instructions regarding the drying time of the bonding agent. Typically, this will take 30 minutes to 1 hour.
Step 3: Reinforce the Hole with Mesh Tape
If the hole is large or deep, mesh tape is necessary to provide reinforcement and prevent future cracks.
- Place the mesh tape: Cut a piece of fiberglass mesh tape slightly larger than the hole. Press the tape into the hole, making sure it adheres to the bonding agent.
- Smooth the tape: If the hole is large, you may want to apply a thin layer of joint compound over the tape to help it stick and smooth out the surface.
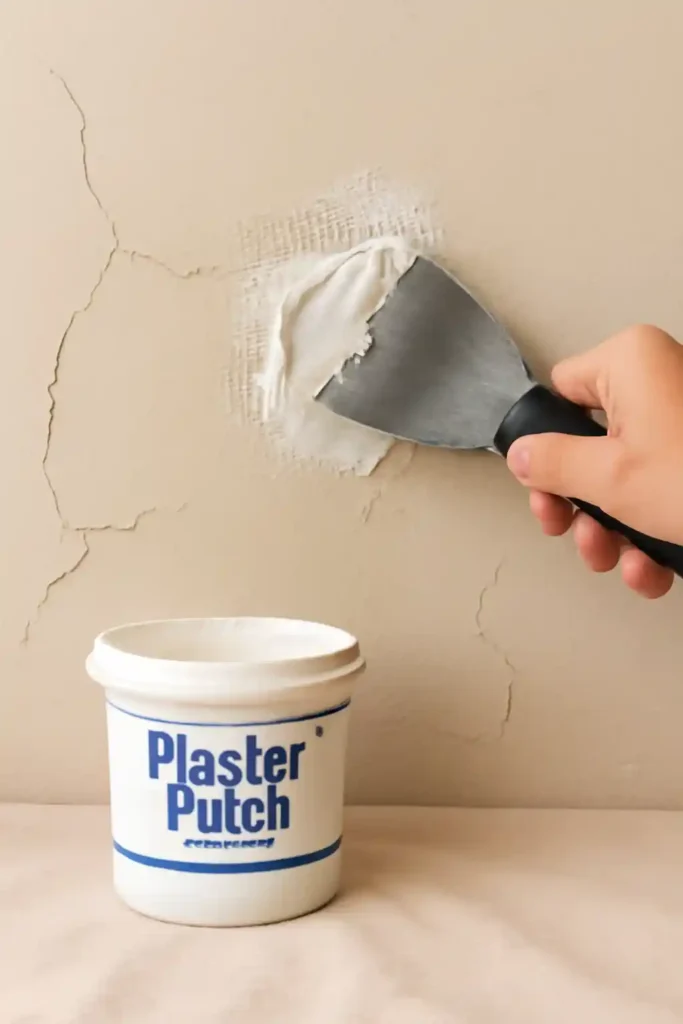
Step 4: Fill the Hole
Now it’s time to fill the hole with plaster repair material:
- Mix the plaster or compound: Follow the instructions on the packaging of plaster of Paris or joint compound to prepare the mixture. Make sure it’s smooth and lump-free.
- Fill the hole: Use a putty knife to apply the plaster compound over the hole, pressing it into the edges and filling the entire void. For larger holes, you may need to apply several layers, allowing each to dry before adding the next.
Step 5: Smooth the Patch
Once the hole is filled, smooth the patched area to match the surrounding wall:
- Smooth with a putty knife: Use a putty knife to spread the compound evenly across the patch. Feather the edges of the patch so it blends seamlessly into the rest of the wall.
- Let it dry: Allow the patch to dry completely before moving on to sanding. This can take anywhere from 12 to 24 hours, depending on the size of the hole and the materials used.
Step 6: Sand the Patch
After the patch has dried, it’s time to make the surface smooth and level:
- Sand the surface: Use a sanding block or fine-grit sandpaper to smooth the surface of the patch. Sand gently, making sure to blend the edges of the patch with the surrounding wall to create an even surface.
- Clean up dust: Once the sanding is done, wipe the area with a damp cloth to remove dust and debris.
Step 7: Prime and Paint
After sanding, the repair area may look slightly different in color from the rest of the wall. To make the patch blend perfectly, follow these steps:
- Prime the patch: Apply a coat of primer to the patched area to help the paint adhere properly.
- Paint the wall: Once the primer has dried, paint the patched area to match the surrounding wall. If needed, apply a second coat of paint for a flawless finish.
Tips for a Successful Plaster Repair:
- Multiple layers: For deep holes, it’s better to apply multiple thin layers of compound rather than one thick layer. This ensures a stronger bond and reduces the risk of cracking.
- Patience is key: Allow each layer to dry completely before sanding or adding another layer. Rushing the process can lead to uneven patches and cracking.
- Use the right materials: For large repairs, plaster of Paris is often the best option because it sets quickly and provides a durable finish.
Conclusion:
Patching holes in plaster walls is a straightforward DIY task that anyone can tackle with the right tools and patience. Whether you’re dealing with small nail holes or larger gaps, following these simple steps will ensure that your walls are restored to a smooth, seamless finish. Remember, proper preparation and patience during the repair process are key to achieving professional-looking results.
Faqs
How long does it take to patch a hole in a plaster wall?
The time it takes to patch a hole in plaster walls depends on the size of the hole and the materials used. For smaller holes, it can take a few hours to clean, apply the patch, and let it dry. Larger holes might take a day or two, with extra time for drying between layers of compound.
Can I use regular joint compound for patching holes in plaster?
Yes, you can use regular joint compound for small repairs. However, for larger or deeper holes, plaster of Paris is recommended because it sets harder and faster, making it ideal for repairs in plaster walls.
Do I need to use mesh tape when patching holes in plaster?
It is recommended to use mesh tape for holes larger than 1/16″ in diameter. Mesh tape reinforces the repair and prevents future cracking, ensuring the patched area stays intact over time.
How can I make sure the patched area blends seamlessly with the rest of the wall?
After applying the plaster compound, make sure to sand the patched area once it’s dry. Use fine-grit sandpaper to smooth out the repair and blend it with the surrounding wall. Then, apply primer and paint to match the existing wall color.