
How to Make DIY Moss Wall Art ?
DIY Moss Wall Art has been steadily gaining popularity among home decor enthusiasts, and for good reason. Imagine adding a touch of nature right into your living space without the need for a green thumb. Whether you’re looking to liven up a dull corner, create a statement piece for your living room, or simply indulge in a creative outlet, crafting your own moss wall art is an incredibly satisfying way to bring the outdoors inside. Best of all, it’s easy, customizable, and requires only a few supplies.
In this step-by-step guide, we’ll walk you through everything you need to know to create your own moss wall art masterpiece from the basic materials to the finishing touches that’ll make your design pop. Ready to add a little bit of nature to your walls? Let’s dive in!
Table of Contents
Materials You’ll Need
Before diving into your DIY moss wall art project, let’s gather everything you’ll need to get started. Fortunately, creating moss art is pretty straightforward most of the materials are easy to find and can be adapted to your style. Here’s a list to get you going:
- Moss: The star of the show! You have a few options here:
- Real Moss: This gives your project an authentic, fresh, natural look. Types like sheet moss, reindeer moss, and pillow moss are popular choices.
- Artificial Moss: If you’re looking for a more durable, low-maintenance option, faux moss could be a great fit. It’s also easier to handle and more versatile in terms of color and texture.
- Real Moss: This gives your project an authentic, fresh, natural look. Types like sheet moss, reindeer moss, and pillow moss are popular choices.
- Frame or Backing: You’ll need a sturdy base to attach the moss. Options include:
- A wooden frame (like a picture frame or shadow box)
- A canvas or plywood board if you prefer a more rustic or raw look.
- A wooden frame (like a picture frame or shadow box)
- Adhesive: The right adhesive is crucial to secure the moss in place. Some options include:
- Hot glue gun: Quick and effective, especially for artificial moss.
- Spray adhesive: Ideal for covering larger areas or real moss.
- Floral wire or pins: If you want to keep things more organic and avoid adhesives altogether.
- Hot glue gun: Quick and effective, especially for artificial moss.
- Scissors or Craft Knife: You’ll need these to trim your moss to the perfect size and shape for your design.
- Optional Decorative Elements:
- Dried flowers, feathers, or small twigs to add texture and variety.
- Spray paint or acrylic paint (for painting the frame or adding color highlights to the moss).
- Dried flowers, feathers, or small twigs to add texture and variety.
- Protective Gear: It’s always a good idea to have gloves and a drop cloth, especially if you’re using glue or paint.
Where to Get Your Materials:
- Local craft stores are a great place to pick up moss, frames, and adhesives.
- Online stores like Amazon, Etsy, or specialized plant shops also offer a wide variety of moss options and decorative elements.
By gathering all these materials ahead of time, you’ll be fully prepared to dive into the creative process!Step-by-Step Guide to Creating Your DIY Moss Wall Art
Now that you’ve gathered all your materials, it’s time to start crafting your beautiful moss wall art. Don’t worry if you’ve never attempted a DIY project like this before this step-by-step guide will walk you through everything you need to know to create your own nature-inspired masterpiece!

Step 1: Prepare Your Frame or Base
The first thing you’ll need is a solid base for your moss. Here are your options:
- Wooden Frame: If you’re using a picture frame, remove the glass and backing. If you prefer a more open look, you can also use a rustic wooden board or plywood as your base.
- Canvas: You can use a blank canvas if you prefer a more textured, ready-to-paint background.
Once you’ve chosen your base, paint or stain the frame if desired. Let it dry completely before proceeding.
Step 2: Prepare the Moss
Now comes the fun part: getting your moss ready!
- If you’re using real moss, give it a gentle rinse and let it dry completely before applying it to the frame. You might also want to separate clumps of moss to get a more even texture when gluing it down.
- For artificial moss, this step is easier since it’s pre-dried and ready to go. Simply pull apart the pieces to break them into manageable sections that will fit your frame.
Step 3: Attach the Moss
Once your moss is prepared, it’s time to attach it to your base. Here’s how:
- For real moss, spray a light coating of adhesive on the frame and gently press the moss onto the adhesive. Be sure to press firmly but gently to keep the texture intact. A spray adhesive works best for this!
- For artificial moss, use a hot glue gun to secure the moss in small sections. Work in layers, starting from the outer edges and working your way in.
Pro Tip: Start with larger clumps and work your way to smaller pieces for a more natural, layered look.
Step 4: Customize Your Design
Now it’s time to get creative! You can arrange the moss however you like, but here are a few ideas to get you started:
- Geometric Shapes: Use the moss to form shapes like circles, triangles, or squares. This gives a modern, sleek vibe to your piece.
- Organic Patterns: Embrace the natural, free-flowing shapes of the moss. Create swirls or clusters of moss for a more abstract look.
- Accent Pieces: Add dried flowers, small twigs, or other decorative items to give your moss wall art more texture and visual interest.
Step 5: Add Final Touches
Once the moss is attached and you’re happy with your design, it’s time for the finishing touches:
- Sealing: To make your moss last longer, spray it with a light coat of floral sealant or clear spray to protect it from dust.
- Framing: If you used a frame, carefully add the backing or hang your art as-is.
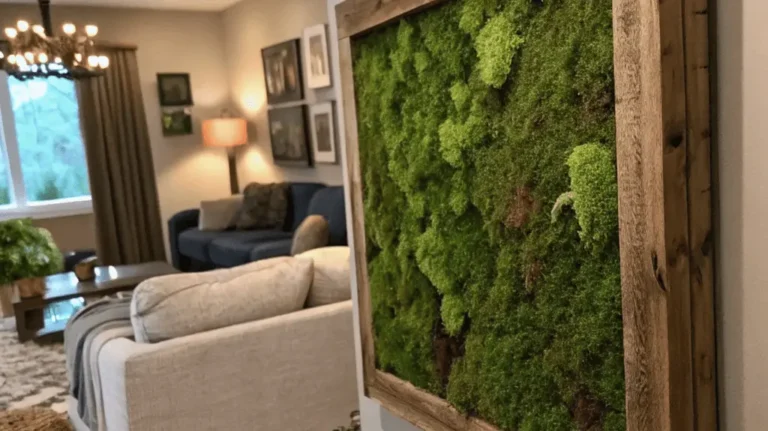
- Display: Place your moss wall art in a prominent spot where it can shine whether it’s above the couch, in your entryway, or as a focal piece in your bedroom.
Now that your DIY moss wall art is complete, you can step back and admire your creativity! Ready to move on to some tips and tricks for maintaining it or customizing further? Let me know if you’d like me to continue!
Tips and Tricks for DIY Moss Wall Art
Creating your DIY moss wall art is just the beginning! To make sure it stays looking fresh and lasts for years, here are some expert tips and tricks to ensure your moss art stays vibrant and beautiful.
1. Keep It Clean
Moss is relatively low-maintenance, but it does require some care to maintain its beauty.
- Dust Regularly: Moss can attract dust over time. Use a soft brush, like a paintbrush, to gently dust off your moss and keep it looking fresh.
- Avoid Direct Sunlight: Real moss can fade if exposed to too much direct sunlight, so try to display your artwork in a shaded area or out of the sun’s direct path.
- Use a Damp Cloth for Faux Moss: If you used artificial moss, lightly dampen a cloth to wipe it down if it collects dust. Avoid soaking it.
2. Keep Your Moss Wall Art Moisture-Free
If you’re using real moss, one of the most common challenges is keeping it from drying out. Here’s how to prevent that:
- Don’t Overwater: Too much moisture can cause real moss to decay. Only lightly mist it every few weeks (a spritz or two will do). Ensure that the moss doesn’t become soggy.
- Add a Protective Coating: After you’ve completed your moss art, consider spraying it with a floral preservative or clear acrylic sealer to help lock in moisture and prevent any decay.
3. Add Personal Touches
Feel free to get even more creative with your design:
- Paint the Moss: You can add a pop of color to your moss by lightly spraying it with non-toxic paint. This works especially well for artificial moss or dried moss, but be sure to test a small area first.
- Incorporate LED Lights: If you want to add a magical touch, string some small LED fairy lights around your moss art. The lights will make the natural texture pop and give the piece an enchanting feel, especially in dimly lit spaces.
4. Re-arrange the Moss for Different Seasons or Occasions
One of the best things about moss wall art is how easy it is to update! Try:
- Seasonal Themes: Change up the moss art to reflect the seasons add autumn leaves or winter berries for a seasonal flair.
- Holidays and Special Occasions: If you love crafting, why not update your moss art to match the holidays? Add little touches of red and green for Christmas, or pastel shades for Easter.
5. DIY Moss Art for Other Spaces
If you’ve mastered the art of moss on a wall, why not expand your creations into other spaces? Try:
- Moss Coasters: Apply moss to small, circular bases for a fun and eco-friendly twist on traditional coasters.
- Moss Mirrors: Frame a mirror with moss for a natural, earthy vibe in your bathroom or hallway.
These tips and tricks will help you care for your DIY moss wall art, enhance its longevity, and open the door to even more creative possibilities. Ready to tackle the next step in your moss art journey?
Frequently Asked Questions (FAQ)
Here are some common questions that DIY enthusiasts often ask when it comes to creating and maintaining moss wall art. If you’re still wondering about something, chances are you’ll find your answer here!
1. What kind of moss is best for wall art?
The type of moss you choose depends on the look you’re going for:
Reindeer Moss: This is one of the most popular types for moss wall art. It’s soft, light, and has a vibrant green color, making it great for adding a natural, fresh look to your design.
Sheet Moss: Often used for larger designs, this moss is flatter and easier to arrange in specific patterns. It’s perfect for covering big areas or creating a smooth, cohesive background.
Preserved Moss: If you’re using real moss, preserved moss is the best option. It’s treated to stay fresh without wilting, making it an excellent choice for moss wall art that’ll last for years.
Artificial Moss: Faux moss is a great low-maintenance alternative. It’s available in a variety of textures and colors, and it’s perfect for creating a long-lasting piece without worrying about care.
2. Can I use fake moss instead of real moss?
Yes, you can absolutely use fake moss! Artificial moss has several benefits:
No Maintenance: Unlike real moss, fake moss doesn’t require watering or misting.
More Durable: It’s perfect for areas with high humidity or lots of sunlight where real moss might not thrive.
More Versatility: You can find artificial moss in a variety of colors and textures, allowing you to customize your moss art even more.
3. How do I keep my moss wall art from wilting?
If you’re using real moss, it’s crucial to ensure it stays hydrated, but not too much! Here’s how:
Lightly mist it with water once a week, depending on the humidity in your home.
Keep it away from direct sunlight to prevent it from drying out too quickly.
Consider applying a floral preservative to help maintain the moss’s natural appearance.
For artificial moss, this isn’t a concern no wilting here!
4. Can I add other plants or decorations to my moss wall art?
Absolutely! Many DIYers enhance their moss wall art with additional elements, like:
Dried flowers or small plants for added texture and color.
Feathers, twigs, or stones for a more natural, woodland feel.
LED lights for a magical, glowing effect.
Feel free to experiment and make your design as unique as you want.
5. How do I hang my moss wall art?
Hanging your moss art is simple! Here are a few options:
If you used a frame, you can hang it just like any picture, using picture hooks or nails.
For a more rustic look, try using floral wire or a sturdy rope to hang the piece from a wall hook.
If your art is on a canvas or wood board, use a set of strong D-rings on the back to ensure it’s securely mounted.
conclusion
Creating DIY moss wall art is a wonderfully creative and rewarding project that brings a touch of nature right into your home. Whether you’re aiming to add a calming green element to your space, craft a bold statement piece, or simply indulge in a hands-on hobby, moss wall art offers endless possibilities for personalization. By following the simple steps outlined in this guide along with the tips and tricks to maintain your creation you’ll be well on your way to crafting a one-of-a-kind piece of art that you can proudly display for years to come.
From selecting the right moss to choosing the perfect design and materials, every step of the process allows you to express your unique style. So, gather your supplies, tap into your creativity, and transform your space with the beauty of DIY moss wall art.
And once your artwork is complete, don’t forget to share it with others! Whether it’s displayed in your living room, hallway, or bedroom, moss wall art is bound to spark conversations and admiration from anyone who sees it.
Ready to start your own moss masterpiece? The natural beauty of moss is waiting to take center stage in your home. Enjoy the process, and happy crafting!