
1. Introduction
You’ve stood before a blank wall and felt its potential—and its intimidation. Large, bare surfaces can feel overwhelming, but they also offer a chance to make a bold personal statement. Welcome to the world of DIY large wall art, where you’ll learn to transform empty expanses into gallery‑worthy focal points that reflect your style, budget, and creativity.
In this guide, you’ll discover:
- Why choose DIY large wall art over store‑bought pieces
- Exactly which materials and tools you’ll need
- How to plan and design your project for maximum impact
- Core techniques—from pure paint to textured and mixed‑media methods
- A detailed step‑by‑step tutorial so you can get started today
- Tips for installation, maintenance, and repair
- Endless inspiration and project ideas
- Answers to your most pressing questions
By the end, you’ll feel equipped to tackle your own large wall art DIY project, saving money while creating something uniquely yours.
Table of Contents
2. Why Choose DIY Large Wall Art
Before you dive into the how‑tos, let’s explore why DIY large wall art might be the perfect path for you:
- High Impact, Low Cost
Store‑bought oversized artwork can cost hundreds—even thousands—of dollars. Creating your own large wall art keeps expenses down to paint, canvas, or basic supplies, while delivering just as much visual drama. - Personalization & Pride
When you make it yourself, every brushstroke, texture, and color choice reflects your taste. You’re not just hanging art—you’re showcasing your personality and craftsmanship. - Therapeutic & Rewarding
Working on a big piece pulls you out of your routine. Whether you paint abstract forms or carve shallow reliefs, the process can be meditative. Plus, completing a large project feels incredibly satisfying. - Adaptable to Any Style
From bold abstract paintings to textured plaster murals, large wall art DIY can suit modern, boho, minimal, or eclectic interiors. You decide the scale, palette, and medium. - Flexibility and Growth
Start small with a canvas panel or budget‑friendly cardboard piece. As your skills grow, so can your ambitions—moving on to giant murals or mixed‑media masterpieces.
By choosing a DIY approach, you not only save money but gain creative control and personal fulfillment. Now, let’s gather everything you need.
3. Materials & Tools You’ll Need
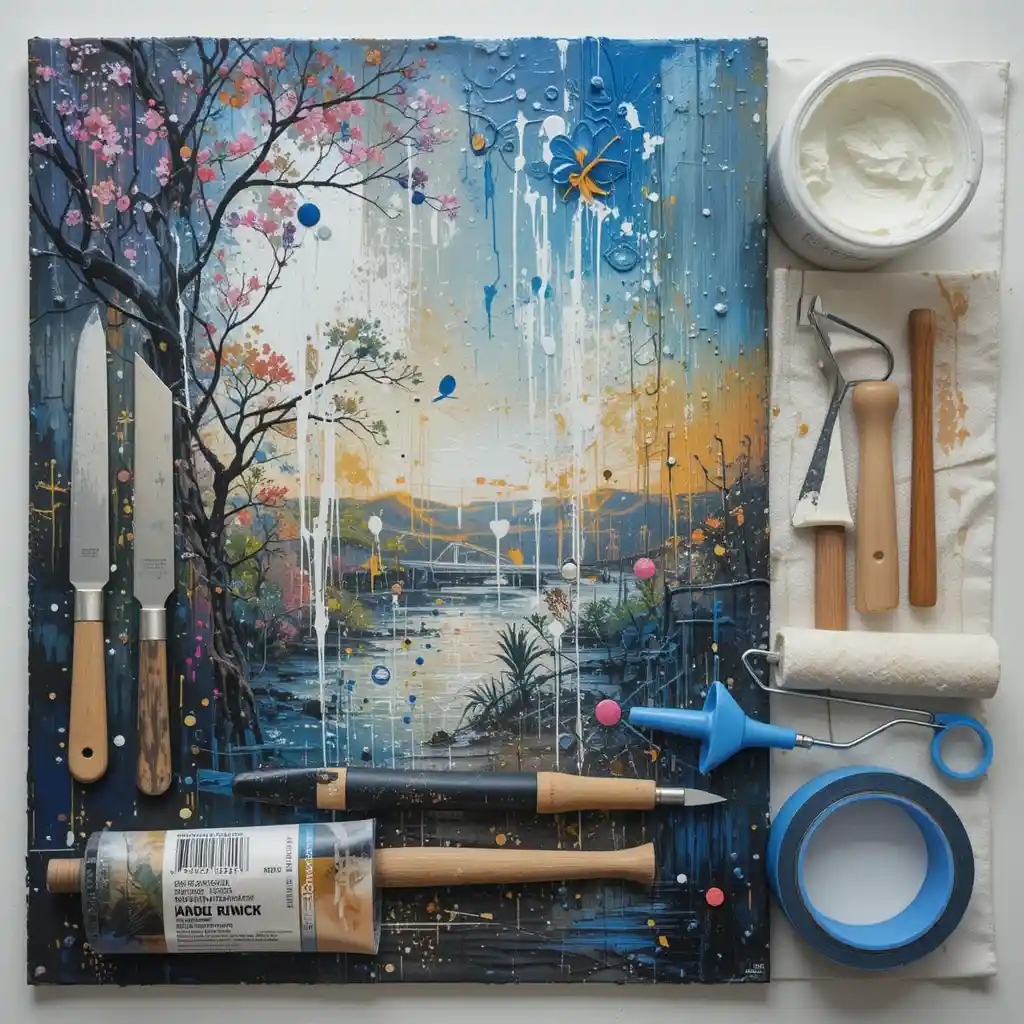
Creating large wall art requires careful selection of surfaces, supplies, and optional extras. Here’s your shopping list:
3.1 Selecting Your Surface
- Stretched Canvas
The classic option. Buy pre‑stretched canvases in sizes up to 48″×72″ or more. - Canvas Drop Cloths
An economical alternative: cut and staple to wooden frames you build yourself. - Wood Panels
Plywood or MDF sheets provide a rigid base—ideal for mixed media and heavy textures. - Wall‑Mounted Murals
Paint directly onto a primed wall for a true statement piece.
3.2 Essential Supplies
- Paints
- Acrylics: Quick‑drying and vibrant.
- Latex/House Paint: Great for murals—covers large areas affordably.
- Plaster & Modeling Paste
For DIY large textured wall art, use lightweight modeling paste to build relief. - Brushes & Rollers
- Large foam rollers for base coats.
- Flat brushes (2″–4″) for broad strokes.
- Detail brushes for fine lines.
- Palette Knives
Perfect for impasto effects and scraping textures. - Mixing Buckets & Trays
Keep your workspace organized and avoid cross‑contamination. - Painter’s Tape
For crisp geometric lines in large geometric wall art. - Drop Cloths & Protective Gear
– Masks, gloves, and eye protection to stay safe.
3.3 Optional Add‑Ons
- Fabric or Paper
Adhere recycled textiles for mixed‑media wall art. - Stencils & Templates
Use laser‑cut stencils for repeat patterns or lettering. - Hardware
- D‑rings, French cleats, or anchor bolts for secure installation.
- Sealers & Varnishes
Protect your finished piece, especially if it hangs outdoors.
With these materials and tools at hand, you’re ready to plan the design. Let’s move on to creating a blueprint for success.
4. Planning & Design
Great artwork begins on paper. Planning helps you avoid wasted effort and ensures a cohesive result.
- Choose Your Concept
- Abstract Expression: Bold color fields, dynamic strokes.
- Geometric Precision: Sharp angles, clean shapes.
- Nature‑Inspired: Landscapes, botanicals, ombre skies.
- Textured Reliefs: Built‑up plaster, mixed media.
- Determine the Size
- Measure your wall.
- Consider focal points: Above a sofa, bed, or behind a desk.
- Sketch a simple box at scale in your floor plan to visualize proportions.
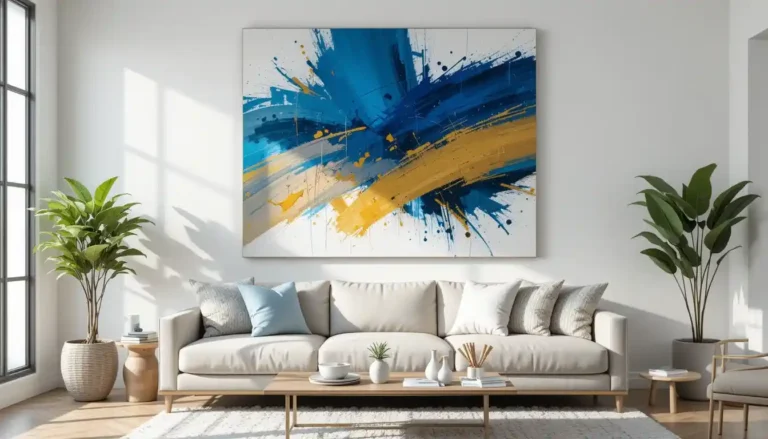
- Ask yourself, “What size should my DIY large wall art be for living rooms?” Aim for 60–80% of wall width for gallery impact.
- Mood‑Boarding
- Gather images of color palettes, textures, and finished pieces that inspire you.
- Include swatches of fabric, photos of paint chips, and small texture samples.
- Sketch the Layout
- Roughly draw your design on paper or digitally.
- Include major color zones, textural areas, and focal elements.
- For murals, divide your sketch into a grid that matches your canvas or wall.
By investing time in planning, you streamline execution and minimize costly mistakes. Next, let’s explore the core techniques that bring your vision to life.
5. Core Techniques for DIY Large Wall Art
Depending on your concept, you can choose one or combine multiple approaches:
5.1 Paint‑Only Methods
- Bold Brushstrokes & Washes
Use large flat brushes or foam rollers to sweep vibrant colors across the canvas. Build up layers of glazes for depth. - Ombre & Gradient Effects
Start with a darker hue at one end, then blend gradually into lighter tones. A wide brush or damp sponge helps smooth transitions. - Drip & Pour Techniques
Pour thinned acrylics or house paint onto your surface, tilt it to guide drips, and then let gravity create organic patterns.
5.2 Textured & Mixed‑Media Approaches
- Modeling Paste Relief
Blend modeling paste with acrylic paint or pigment, then sculpt peaks and ridges using a palette knife. While the paste remains pliable, carve or impress lines and abstract shapes. - Fabric & Paper Collage
Adhere swatches of fabric, torn paper, or magazine clippings to your surface with matte medium, then apply a clear varnish to lock in the design. - Recycled Materials
Incorporate elements like corrugated cardboard, wood off‑cuts, or found objects to build a layered, sculptural wall panel.
5.3 Geometric & Stenciled Designs
- Tape‑Resist Patterns
Mask off triangles, stripes, or hexagons with painter’s tape. Paint within the lines, then remove tape to reveal crisp geometry. - Laser‑Cut Stencils
Position stencils over your surface and apply paint or texture medium through the cutouts for precise motifs. - Layered Shapes
Cover your surface with a broad base color, then paint smaller, contrasting shapes on top to create striking depth and visual movement.
5.4 Oversized Murals & Wall Panels
- Grid Method
Transfer your sketch to the wall by drawing a matching grid. Fill in each square one at a time for accuracy. - Projector Technique
Project your digital design directly onto the wall at night, trace outlines, then paint or texture within the lines. - Modular Panels
Create several panels that align to form a giant composite image—perfect for renters or rotating exhibitions.
Each technique offers unique visual impact. Choose the one that aligns with your style, skill level, and available materials.
6. Step‑by‑Step Tutorial: Create Your Own Large Wall Art

Let’s walk through a basic project combining paint and texture:
- Prep Your Surface
- Lay down drop cloths and secure edges with tape.
- Wipe your canvas or wall with a damp cloth to remove dust.
- Prime with gesso (canvas) or diluted plaster slurry (wall) for better adhesion.
- Mix & Tint Your Media
- In a bucket, combine modeling paste with pigment or acrylic paint to achieve a thick, workable paste.
- Stir house paint into water (3:1 ratio) for a wash effect.
- Apply Base Coat
- With a roller, apply your main color wash or a thin plaster layer. Let it dry until tacky (20–30 minutes).
- Add Texture & Detail
- Use a palette knife to sweep paste across the surface in waves, peaks, or abstract forms.
- While the paste is still wet, carve lines or press in a stencil.
- Alternately, sprinkle coarse sand onto wet paint for subtle grit.
- Finishing Touches
- Once fully dry (24 hours for paste), sand any harsh edges lightly.
- Seal with clear matte varnish or wax for protection.
- Attach hanging hardware aligned to your wall studs.
Voilà—you’ve created a stunning piece of DIY large wall art that combines color, texture, and personal flair.
7. Installation & Hanging Tips
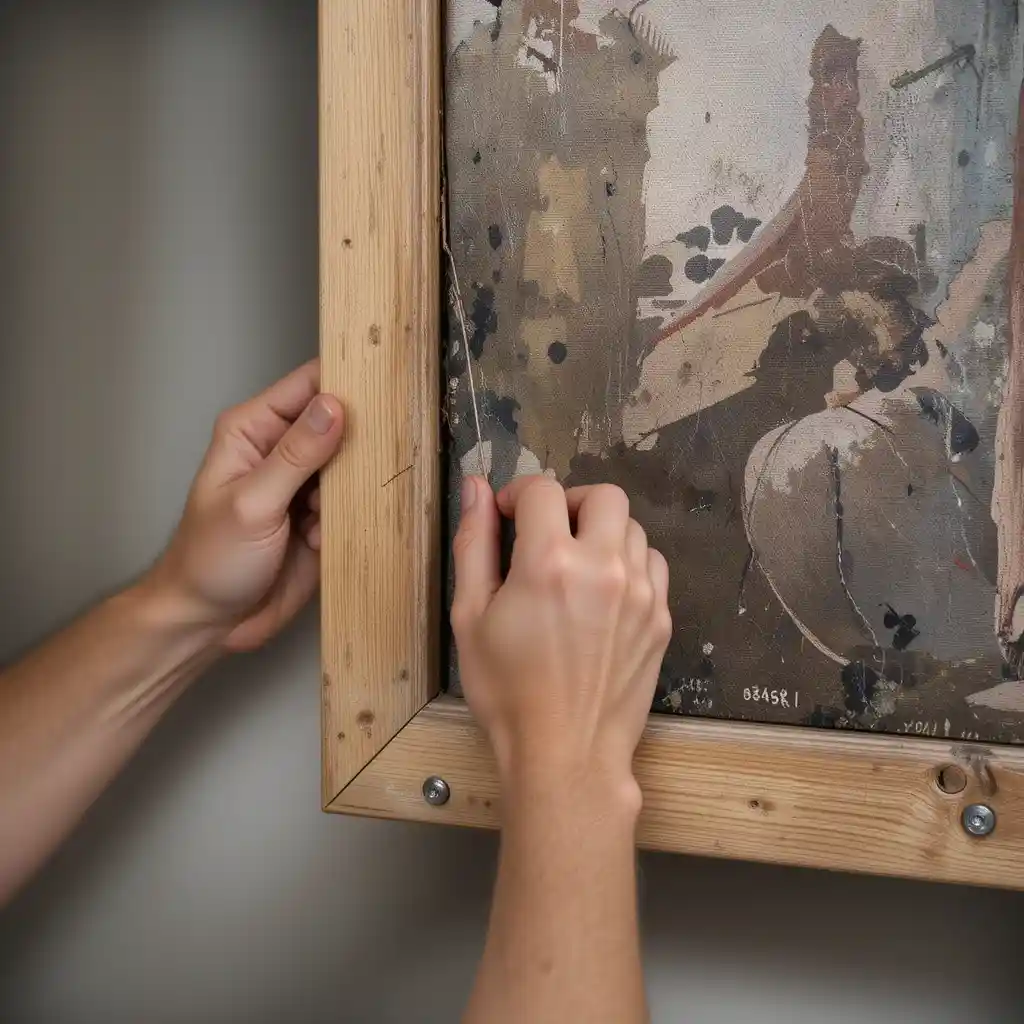
Securing your masterpiece properly ensures it stays safe and level:
- Locate Studs
Use a stud finder to anchor heavy canvases or panels to solid wood behind the drywall. - Anchor Options
- For canvases ≤20 lbs: Heavy‑duty picture hooks.
- For panels or mixed‑media boards: Toggle bolts or French cleats.
- Level & Layout
- Measure and mark placement with painter’s tape before drilling.
- Use a laser or bubble level to guarantee straight alignment.
- If installing multiple panels, use spacers to maintain consistent gaps.
- Adjust & Secure
- Hang the piece, then step back to confirm placement.
- Tighten screws or hooks to prevent shifting.
Proper hanging keeps your large wall art DIY investment safe, secure, and perfectly showcased.
8. Maintenance & Repair
Even the best art needs occasional care:
- Dusting
Gently brush surfaces with a microfiber duster or soft paintbrush—avoid water on unsealed textures. - Spot Cleaning
Dampen a lint‑free cloth with mild soapy water; blot stains gently. Test in an inconspicuous area first. - Crack or Chip Repair
- Mix a small batch of modeling paste or gesso matching your texture.
- Apply with a palette knife, sculpt to blend with surrounding relief, and let cure.
- Repaint area if needed.
- Varnish Renewal
If you used a wax seal, buff and reapply paste wax annually. With varnish, lightly scuff and add a fresh coat as it dulls.
Routine upkeep keeps your DIY large wall art looking fresh and museum‑quality for years.
9. Inspiration & Project Ideas
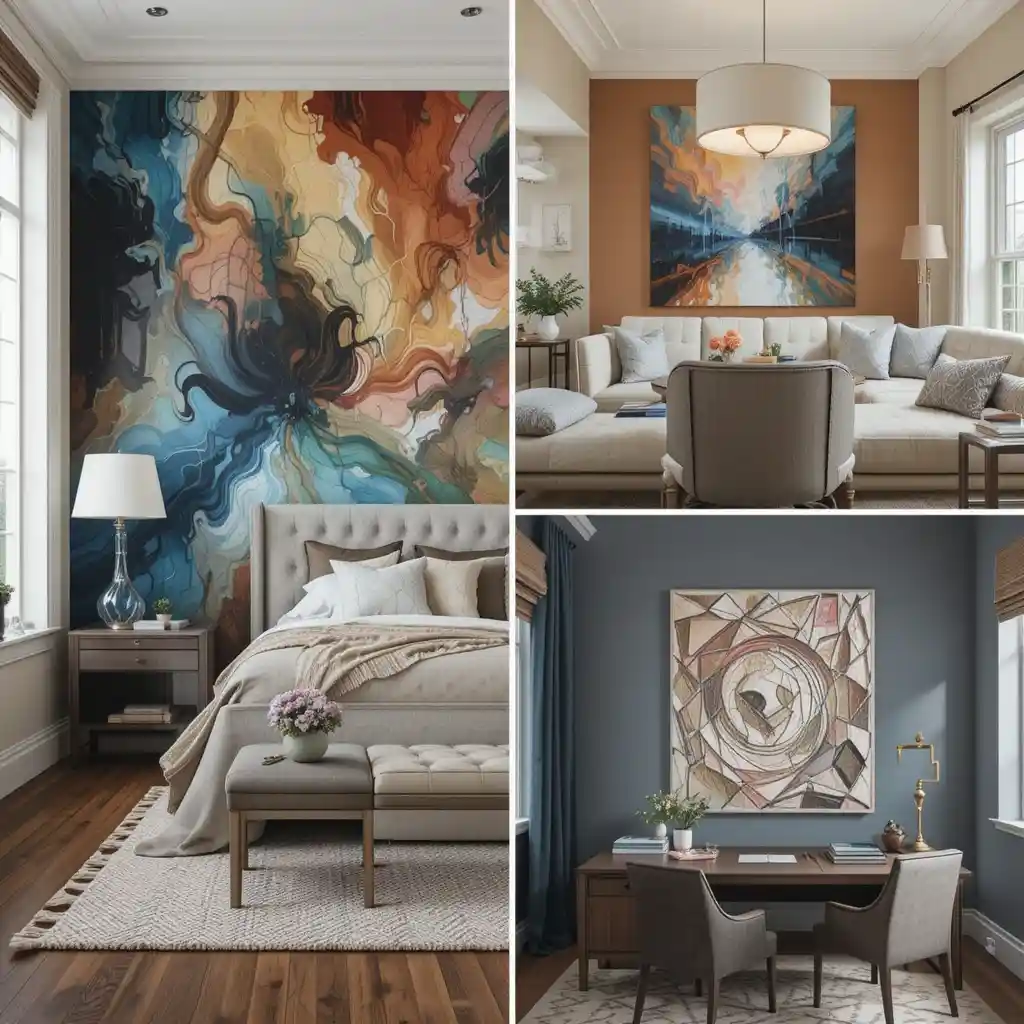
Stuck for ideas? Here are starter concepts to spark your creativity:
- Bold Abstract Canvases
Large blocks of contrasting color—think black and gold streaks on white. - Nature Murals
A sweeping mountain range or forest scene painted directly on your living room wall. - 3D Relief Panels
Mount three to five smaller panels in a grid, each with raised plaster shapes that play with light. - Text‑Based Art
Use stencils to spell quotes or single words in large letters—then flood with color washes. - Recycled Collage
Combine reclaimed wood slats, scraps of canvas, and fabric for a tactile, eco‑friendly piece. - Geometric Tape Art
Mask off triangles or stripes, paint each section in different hues, then remove tape to reveal crisp lines.
Each idea can be scaled to fit your wall and skill level. Remember, the key to successful DIY large wall art projects is practice, patience, and playful experimentation.
10. Frequently Asked Questions (FAQ)
Q1: How do I make large wall art myself?
A1: Choose a surface (canvas or wall), gather basic supplies (paint, paste, brushes), plan your design, and follow a step‑by‑step method: prime, base coat, texture/detail, seal.
Q2: What materials do I need for large DIY wall art?
A2: Essentials include acrylic or house paint, modeling paste, rollers, palette knives, brushes, drop cloths, and hanging hardware. Optional: fabrics, stencils, mixed media pieces.
Q3: Can I create oversized wall art on a budget?
A3: Absolutely—use canvas drop cloths stapled to homemade frames, thrifted wood panels, and budget‑friendly paints. Upcycle materials like cardboard or fabric scraps.
Q4: How do I hang large DIY wall art safely?
A4: Locate studs, use appropriate anchors (toggle bolts for heavier pieces), and ensure level placement with spacers. French cleats offer strong support for large panels.
Q5: What size should my large wall art be for living rooms?
A5: Aim for artwork that spans 60–80% of the wall’s width.When hanging art above a sofa, maintain a 6–12 inch gap between the top of the sofa and the bottom of the artwork.
11. Conclusion & Call‑to‑Action
You’ve now unlocked the secrets of DIY large wall art, from choosing materials and planning your design to mastering core techniques and ensuring long‑term care. Whether you’re tackling a bold abstract piece, a sculptural relief, or a vibrant mural, you have the knowledge to make any wall your personal gallery.
Now it’s your turn. Grab your tools, select your color palette, and dive into your first project. Share your masterpiece and inspire others by posting with #DIYLargeWallArt on Instagram or Facebook. Got questions or want feedback on your progress? Drop a comment below or join our community forum— we’re here to help every step of the way.
Transform your walls, express your creativity, and celebrate the satisfaction of a job well done. Your blank wall is waiting—make it unforgettable.