
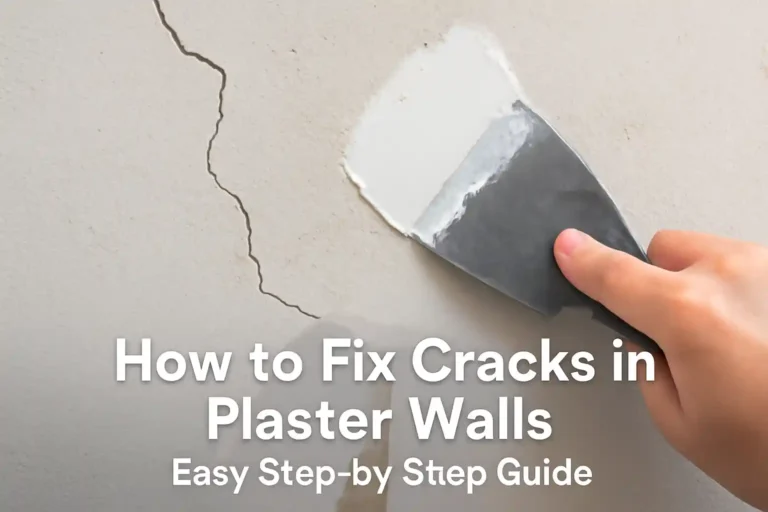
Cracks in Plaster Walls
Cracks in plaster walls are a common problem, particularly in older homes. While they might seem like a small issue at first, if left untreated, they can lead to bigger, more expensive problems. Whether it’s a tiny hairline crack or a larger gap, knowing how to properly repair plaster cracks can save you both time and money. In this guide, we’ll walk you through how to fix cracks in plaster walls using simple tools and materials.
Table of Contents
What You’ll Need:
Before you start fixing those cracks, it’s a good idea to gather your materials. Here’s what you’ll need:
- Plaster bonding agent – to help the repair material stick to the wall.
- Fiberglass mesh tape – this helps reinforce the crack.
- Joint compound or plaster repair compound – to fill the cracks.
- Putty knives – usually a 4-inch and a 6-inch one for different areas.
- Sanding block or sandpaper – for smoothing things out when you’re done.
- Utility knife – to remove any loose plaster around the crack.
- Dust mask and safety glasses – for safety while sanding.
Step-by-Step Guide to Fixing Cracks in Plaster Walls
Step 1: Identify the Type of Crack
It’s important to figure out what kind of crack you’re dealing with before starting the repair. Different cracks require different approaches.
- Hairline Cracks: These are small and often caused by normal settling or temperature changes.
- Medium Cracks: These cracks are a bit wider and might be the result of moisture or minor shifts in the wall structure.
- Large Cracks: Larger cracks (over 1/8”) are usually caused by more significant issues like water damage or structural problems.
Step 2: Prepare the Area
Getting the area ready is just as important as the repair itself. Here’s what you should do first:
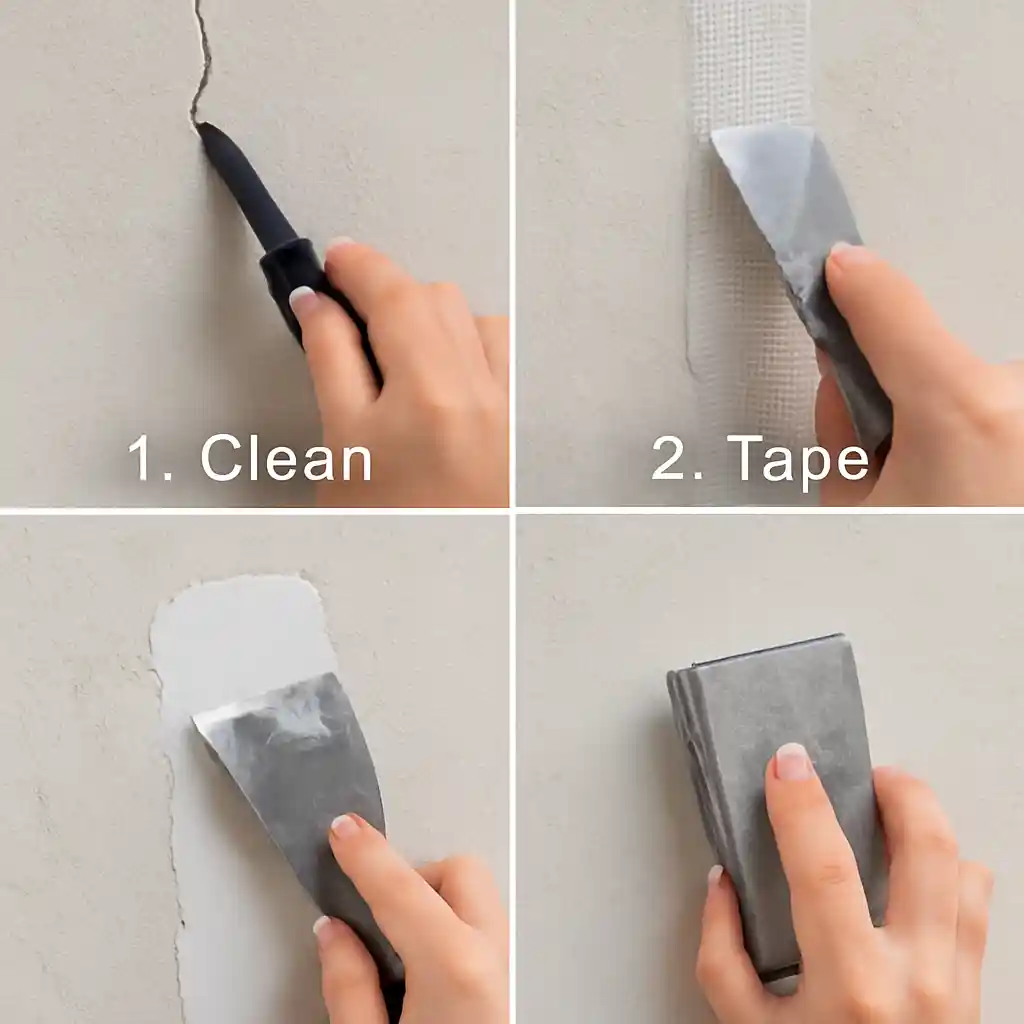
- Clean the crack: Use your utility knife to remove any loose plaster or debris around the crack. You want the bonding agent and plaster repair material to adhere properly.
- Clean the surrounding wall: Wipe down the area to remove dust and dirt. This ensures a smooth surface for the repair.
- Apply bonding agent: Brush a thin layer of bonding agent over the crack and the surrounding area. This will make sure that the plaster repair material sticks well.
Step 3: Fix the Crack
Now, it’s time to repair the crack. Here’s how to go about it:
- For Hairline Cracks:
- If the crack is wide enough, apply a piece of fiberglass mesh tape over it.
- Using a putty knife, spread a thin layer of joint compound over the mesh tape, making sure to feather the edges so it blends with the wall.
- Let the compound dry (this should take about 24 hours). After it’s dry, sand it smooth. If you need a second coat, apply it and sand again until it’s smooth and even.
- For Medium Cracks:
- Clean the crack and apply the bonding agent.
- Fill the crack with plaster repair compound or plaster of Paris. Use your putty knife to spread the compound over the crack, and make sure it fills the entire gap.
- If necessary, reinforce the crack with mesh tape.
- Let it dry, then sand it smooth. If the crack is still visible, apply another layer of compound, let it dry, and sand again.
- For Large Cracks:
- Start by cleaning the crack thoroughly, then apply a bonding agent to the area.
- For deeper cracks, fill them with plaster of Paris or a plaster repair compound. Use a putty knife to press the compound into the crack.
- Apply mesh tape for extra reinforcement and add another layer of compound over the tape.
- Allow it to dry completely before sanding smooth. You may need to apply a few layers for a perfect finish.
Step 4: Finishing Touches
Once the crack is repaired, you’ll want to make sure the patch blends seamlessly with the rest of the wall:
- Sand the surface: Use a sanding block or fine sandpaper to smooth the repair area. Ensure it’s flush with the surrounding wall so it’s not noticeable.
- Prime and Paint: If the repair area stands out, prime it before applying paint. This will ensure that the paint adheres evenly and that your repaired wall looks as good as new.
Step 5: Prevent Future Cracks
While it’s impossible to completely prevent cracks, you can take steps to reduce the risk:
- Control humidity: Moisture can cause plaster to crack. Make sure to address any water leaks quickly and use a dehumidifier if necessary.
- Structural issues: If you notice cracks recurring in the same areas, it could be a sign of structural movement. In such cases, consult a professional to check for foundation issues.
Conclusion:
Fixing cracks in plaster walls doesn’t have to be a stressful job. With a little patience and the right materials, you can restore the smooth surface of your walls and prevent further damage. Whether it’s a small crack or a larger gap, following these steps will leave your plaster walls looking fresh and well-maintained.
For more details on repairing plaster walls, check out our comprehensive guide on [How to Repair Plaster Walls]
FAQ
How long does it take to repair cracks in plaster walls?
The time to repair plaster cracks depends on the size of the crack and the materials used. For minor cracks, expect to spend about 1–2 hours on preparation and repair, plus 24 hours for drying time. Larger cracks or deeper repairs might take 2–3 days for complete drying and finishing.
Can I use regular joint compound for repairing plaster cracks?
Yes, regular joint compound (also called drywall mud) can be used for repairing small to medium cracks in plaster walls. However, for deeper cracks or structural damage, plaster repair compound or plaster of Paris may be more effective due to its stronger setting properties.
Do I need mesh tape to repair cracks in plaster walls?
It is recommended to use mesh tape for cracks that are wider than 1/16″ to prevent the crack from reopening. Mesh tape provides reinforcement and ensures the repair is durable, especially when filling deeper cracks in plaster walls.
Can I repair plaster cracks without sanding?
While it’s technically possible to repair plaster cracks without sanding, it’s not recommended. Sanding ensures the repaired area blends seamlessly with the rest of the wall, creating a smooth, uniform surface. Skipping this step may leave noticeable ridges or imperfections.
How do I know if a plaster crack is serious and needs professional help?
If the crack is large (wider than 1/8″), continues to grow over time, or is accompanied by sagging plaster or moisture issues, it’s best to consult a professional. These could be signs of structural issues or significant water damage that may require specialized repair techniques.
Wall Art Sizes – A Complete Guide
https://www.wallartideas.blog/2025/06/wall-art-sizes-complete-guide.html?m=1