
Introduction
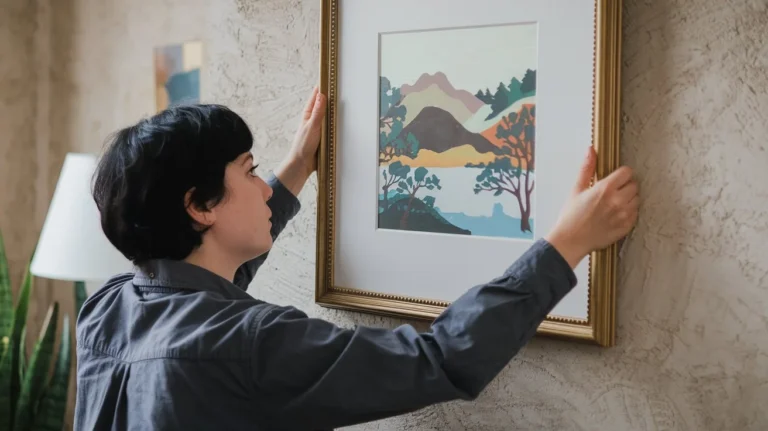
If you’ve ever stared at a blank plaster wall, contemplating how to showcase your favorite artwork without creating an unsightly crack, you’re not alone. Plaster walls can be finicky: too much force and they crumble, too little and your frames slip. In this guide, you’ll discover exactly how to hang pictures on plaster walls without causing damage or stress. You’ll learn why plaster demands special care, which tools will make the job easier, and step-by-step methods for both lightweight prints and heavy canvases. By the end, you’ll feel confident tackling your wall-hanging project with precision and ease.
Table of Contents
Why Plaster Walls Need Special Care
Plaster isn’t just a thicker, tougher drywall—its composition and age often make it fragile. Here’s what sets it apart:
- Lath-and-plaster structure: Older homes usually feature a thin wooden slat (lath) base covered by one or two coats of plaster, which can crack if overstressed.
- Brittleness increases with age: Over decades, plaster can dry out, becoming more prone to crumbling when pierced.
- Risk of hidden voids: Unlike drywall, you can’t always rely on a stud finder to detect a stud—you might encounter an empty gap or even wiring behind the surface.
Because of these traits, drilling or hammering without the right prep can lead to chips, cracks, or holes that are difficult to patch. Understanding these characteristics helps you choose the right approach every time.
Tools and Supplies You’ll Need
Before you begin, gather these essentials. Having the correct gear will make the difference between a clean job and a plaster disaster.
| Item | Purpose |
| Stud finder for plaster | Identifies wooden laths (and sometimes hidden studs) |
| Drill with masonry bit | Cleans holes for anchors without cracking |
| Masonry hooks / plaster hooks | Specialized hooks with tiny teeth designed for plaster surfaces |
| Molly bolts or toggle bolts | Heavy-duty anchors for medium to large frames |
| Adhesive hooks / command strips | No-drill option for very light prints (up to 5 lbs) |
| Level and measuring tape | Ensures perfect alignment |
| Pencil and painter’s tape | Marks drill points without slipping |
| Small putty knife & plaster patch | For repairing holes when you remove hooks |
Pro tip: Always use a masonry drill bit that’s slightly smaller than your anchor’s outer diameter. This creates a snug fit without stressing the plaster.
How to Hang Light Pictures on Plaster Walls (No Drilling)

If your frames weigh less than 5 – 7 lbs, you can often skip drilling altogether. Here’s how:
- Clean the surface
- Wipe the wall with a damp cloth to remove dust—adhesive sticks best to a clean surface.
- Let it dry fully before proceeding.
- Wipe the wall with a damp cloth to remove dust—adhesive sticks best to a clean surface.
- Choose the right adhesive
- Standard Command™ strips or adhesive hooks rated for plaster will work.
- Look for products specifically labeled for textured or plaster walls.
- Standard Command™ strips or adhesive hooks rated for plaster will work.
- Prepare and apply
- Peel off backing and press the hook or strip onto the wall for 30 seconds.
- Attach the frame to the hook immediately to activate the adhesive.
- Peel off backing and press the hook or strip onto the wall for 30 seconds.
- Observe weight limits
- Don’t exceed the manufacturer’s rating.
- For a frame cluster, distribute weight across multiple hooks.
- Don’t exceed the manufacturer’s rating.
- Removal without damage
- Slide the adhesive strip’s tab straight down—slowly stretching it—to release without peeling paint or plaster.
- Slide the adhesive strip’s tab straight down—slowly stretching it—to release without peeling paint or plaster.
Using hanging pictures without nails methods keeps your walls pristine and makes rearranging effortless.
How to Hang Heavy Pictures on Plaster Walls (With Anchors)
For anything over 7 lbs—large canvases, mirrors, gallery walls—you’ll need proper anchors. Follow these steps:
- Locate a solid backing
- Use a stud finder for plaster: run it slowly across the wall, looking for subtle changes.
- Mark edges of any wood lath or stud with painter’s tape.
- Use a stud finder for plaster: run it slowly across the wall, looking for subtle changes.
- Mark and level
- Measure the frame’s hanging points, then transfer those measurements to the wall.
- Use a level to ensure your marks are perfectly horizontal.
- Measure the frame’s hanging points, then transfer those measurements to the wall.
- Drill pilot holes
- Fit your drill with the appropriate masonry bit (usually ⅛” – ³⁄₁₆” for smaller anchors; up to ¼” for larger toggles).
- Drill slowly to avoid vibrations that can crack plaster.
- Fit your drill with the appropriate masonry bit (usually ⅛” – ³⁄₁₆” for smaller anchors; up to ¼” for larger toggles).
- Insert anchors
- Molly bolts: push them into the hole, then tighten the screw until the collar expands behind the wall.
- Toggle bolts: fold the spring wings, push through the hole, then tighten until snug.
- Molly bolts: push them into the hole, then tighten the screw until the collar expands behind the wall.
- Attach hook or bracket
- Screw your hanging hardware into the anchor, leaving the hook or bracket at the advertised height.
- Hang your frame, then test gently.
- Screw your hanging hardware into the anchor, leaving the hook or bracket at the advertised height.
- Prevent cracking
- Avoid overtightening screws.
- If the wall shows hairline cracks, stop immediately and consider switching to a no-drill rail system.
- Avoid overtightening screws.
By mastering the use of plaster wall anchors, you’ll secure even the heaviest décor without risking damage.
Picture Hanging Systems for Plaster Walls
If you love updating your layout or have a rental where drilling is restricted, a picture rail system offers flexibility:
- What it is: A horizontal rail mounted near the ceiling, with steel cables and adjustable hooks that hold your frames.
- Installation:
- Mount the rail to studs using long screws.
- Hang cables from the rail, sliding hooks to your desired height.
- Mount the rail to studs using long screws.
- Benefits:
- Zero holes in the plaster below the rail.
- Easily shift and swap art.
- Suitable for lightweight to medium-weight frames (check rail’s weight capacity).
- Zero holes in the plaster below the rail.
Picture rails combine elegance with practicality, especially in historic homes where preserving plaster is paramount.
Mistakes to Avoid When Hanging Pictures on Plaster
Even the best methods can backfire if you slip up. Watch for these common errors:
- Using regular nails: They can shatter plaster or slip out.
- Skipping pilot holes: Forces the anchor in at an angle, leading to uneven frames or cracks.
- Over-tightening anchors: Expands too aggressively, stressing the wall.
- Ignoring wall condition: Loose or sagging plaster may need repair before hanging anything.
- Failing to distribute weight: Large pieces should use at least two anchors, spaced evenly.
By steering clear of these pitfalls, you’ll keep your walls intact and your frames level.
How to Repair Plaster After Removing Picture Hooks
Eventually, you may decide to refresh your layout. Here’s how to patch holes like a pro:
- Clean and prep
- Remove leftover adhesive or loose plaster fragments.
- Sweep out dust with a small brush.
- Remove leftover adhesive or loose plaster fragments.
- Apply patching plaster
- Use a putty knife to fill the hole with spackle or a lightweight plaster compound.
- Smooth until flush with the wall.
- Use a putty knife to fill the hole with spackle or a lightweight plaster compound.
- Sand and finish
- Once dry, sand lightly with fine-grit paper.
- Wipe away dust before painting.
- Once dry, sand lightly with fine-grit paper.
- Touch up paint
- Blend in with the surrounding color—consider a small roller for texture match.
- Blend in with the surrounding color—consider a small roller for texture match.
Proper patching means your walls look brand-new, ready for the next masterpiece you choose to display.
FAQs – Hanging Pictures on Plaster Walls
Can I use nails on plaster walls?
No—plain nails often cause plaster to crack or crumble. Instead, opt for specialized plaster hooks or small wall anchors designed to bite into the plaster without shattering it.
Are command strips good for plaster walls?
Yes, for very light frames (under 5 lbs). Make sure the wall is clean and dry, and choose command strips specifically rated for textured or plaster surfaces to ensure proper adhesion.
How do I find a stud behind a plaster wall?
Use a stud finder set to “deep scan” mode. Move it slowly across the wall in horizontal passes—studs are typically spaced about 16 inches apart. Mark multiple strong signals to confirm the stud location before drilling.
What’s the best hook for plaster walls?
Look for masonry or plaster hooks with tiny hardened teeth. These hooks grip directly into plaster without requiring a large hole or anchor, and they minimize risk of cracking.
How do I stop plaster from cracking when drilling?
Drill at a low, steady speed using a masonry bit. First make a small pilot hole, then enlarge it only if necessary. Avoid overtightening anchors—stop as soon as they feel snug to prevent over-expansion and stress on the plaster.
Conclusion
Hanging pictures on plaster walls doesn’t have to be intimidating. By choosing the right method—whether it’s adhesive hooks, molly bolts, or a picture rail system—you can display your art securely and avoid costly repairs. Remember to:
- Prep your wall and tools carefully
- Match your hanging method to the frame’s weight
- Drill pilot holes at the correct size and speed
- Distribute weight across multiple anchors when necessary
Now it’s your turn: gather your supplies, pick your favorite print, and transform that blank plaster surface into a captivating gallery wall. Share your results in the comments below or subscribe to our newsletter for more home-decor tips and tricks!
1 thought on “How to Hang Pictures on Plaster Walls Without Damage: Step-by-Step Guide”